Please only follow the instructions on this page AFTER you have received confirmation that your Shaheen account has been created.
Introduction
KAUST Supercomputing Laboratory (KSL) utilises Two-Factor authentication (2FA), to facilitate secure SSH logins to Shaheen. With 2FA, you must successfully authenticate twice, using two separate methods, before you will be granted access to a login node. The first factor is password or SSH key. The second factor employed is a One Time Password (OTP). One-time passwords, as the name suggests, can be used only once and, as in the case of Shaheen, are only ever valid for a short time (approx 1 minute), after which they become invalid and a new OTP must be generated.
If you are a KAUST user, you can use your existing KAUST Active Directory (portal) credentials to login to Shaheen.
If you are an non-KAUST user, you can do the same once you are in possession of your KAUST credentials. If you are a non-KAUST user and do not yet have a Shaheen account, please refer to this link: https://hpc.kaust.edu.sa/content/apply-access.
Accessing Shaheen from Outside the KAUST Campus
To access Shaheen remotely, you must use the KAUST VPN.
This security measure provides an additional layer of protection against account sharing and account theft.
VPN Access
- All Shaheen users are granted access to the KAUST VPN service.
The KAUST VPN requires its own Two-Factor Authentication (2FA) system based on DUO, which must be used when accessing Shaheen from outside.
It is therefore necessary to use 2FA two times when accessing Shaheen from outside the KAUST Campus.
- First time (VPN 2FA DUO) to establish a VPN tunnel with KAUST Campus network
- Second time (Shaheen OTP App) to log in to Shaheen node (see below)
If you experience any issues using the KAUST VPN, contact the KAUST IT Helpdesk at ithelpdesk@kaust.edu.sa for assistance.
Using the KAUST VPN ensures a secure, reliable connection to Shaheen from outside the KAUST campus.
Setting up your Shaheen OTP App
We strongly recommend that you install the OTP application on a separate physical device from your workstation. The following OTP applications have been tested and proven to work successfully with our servers:
- FreeOTP (Android/iOS)
- Google Authenticator (Android/iOS)
- Duo Mobile (Android/iOS)
- OTP Manager (MacOS)
- WinAuth (Windows)
- OATH Toolkit (Linux)
- Microsoft Authenticator (iOS/Android/Windows Mobile)
Other clients that support the TOTP (Time-based One-Time Password) algorithm, including hardware based tokens, are untested but should also work without any problem.
Adding the Secret Seed to the App
The secret seed is generated by the KSL team and is securely passed to the user for storing in their OTP app. The secret seed is expressed as a QR code, and each app can read the seed by scanning the code. Once you have installed your OTP app, please login to https://hpc.kaust.edu.sa/user/login using your Active Directory username and password (i.e. your Shaheen username and password), and you will be presented with your User Settings page.
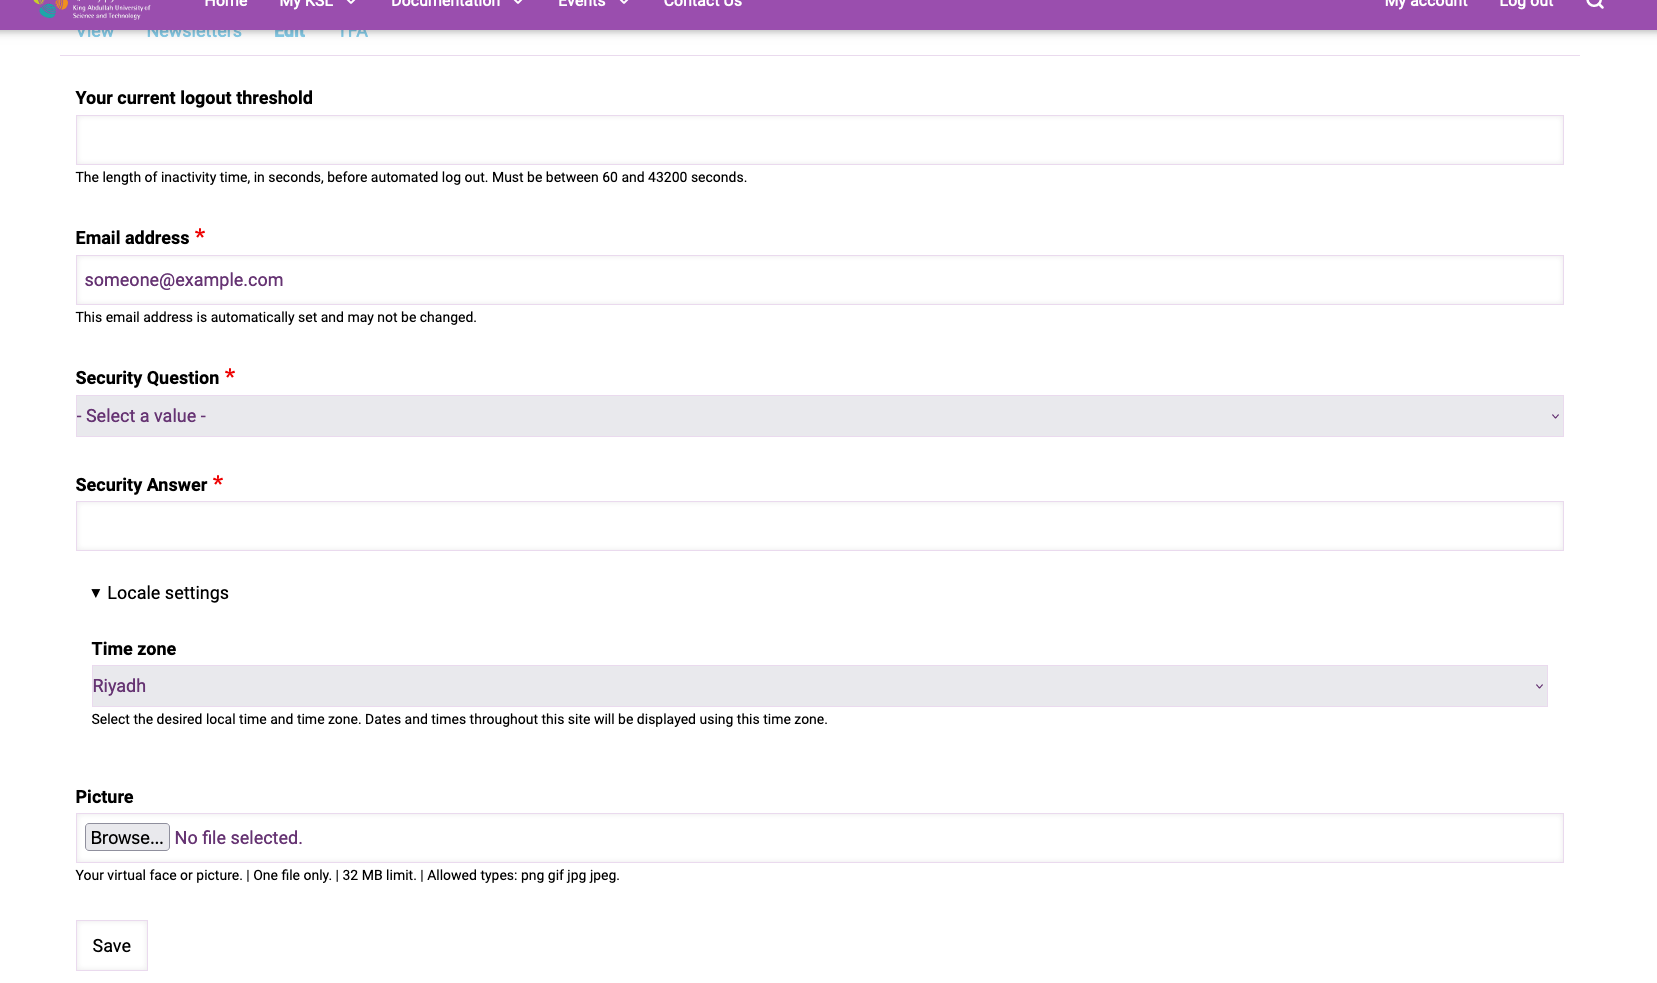
If this is the first time that you have logged into the website, you will be required to setup your website Security Question and Answer, as in the screenshot below:

This information can be used in the next step to retrieve your OTP seed QR code. Bear in mind that this security information is visible to members of the Shaheen administration team, and may be used in the future to confirm your identity. You may notice the tab labelled TFA here - note that this is nothing to do with your Shaheen 2FA, it optionally adds two factor authentication to your website login.
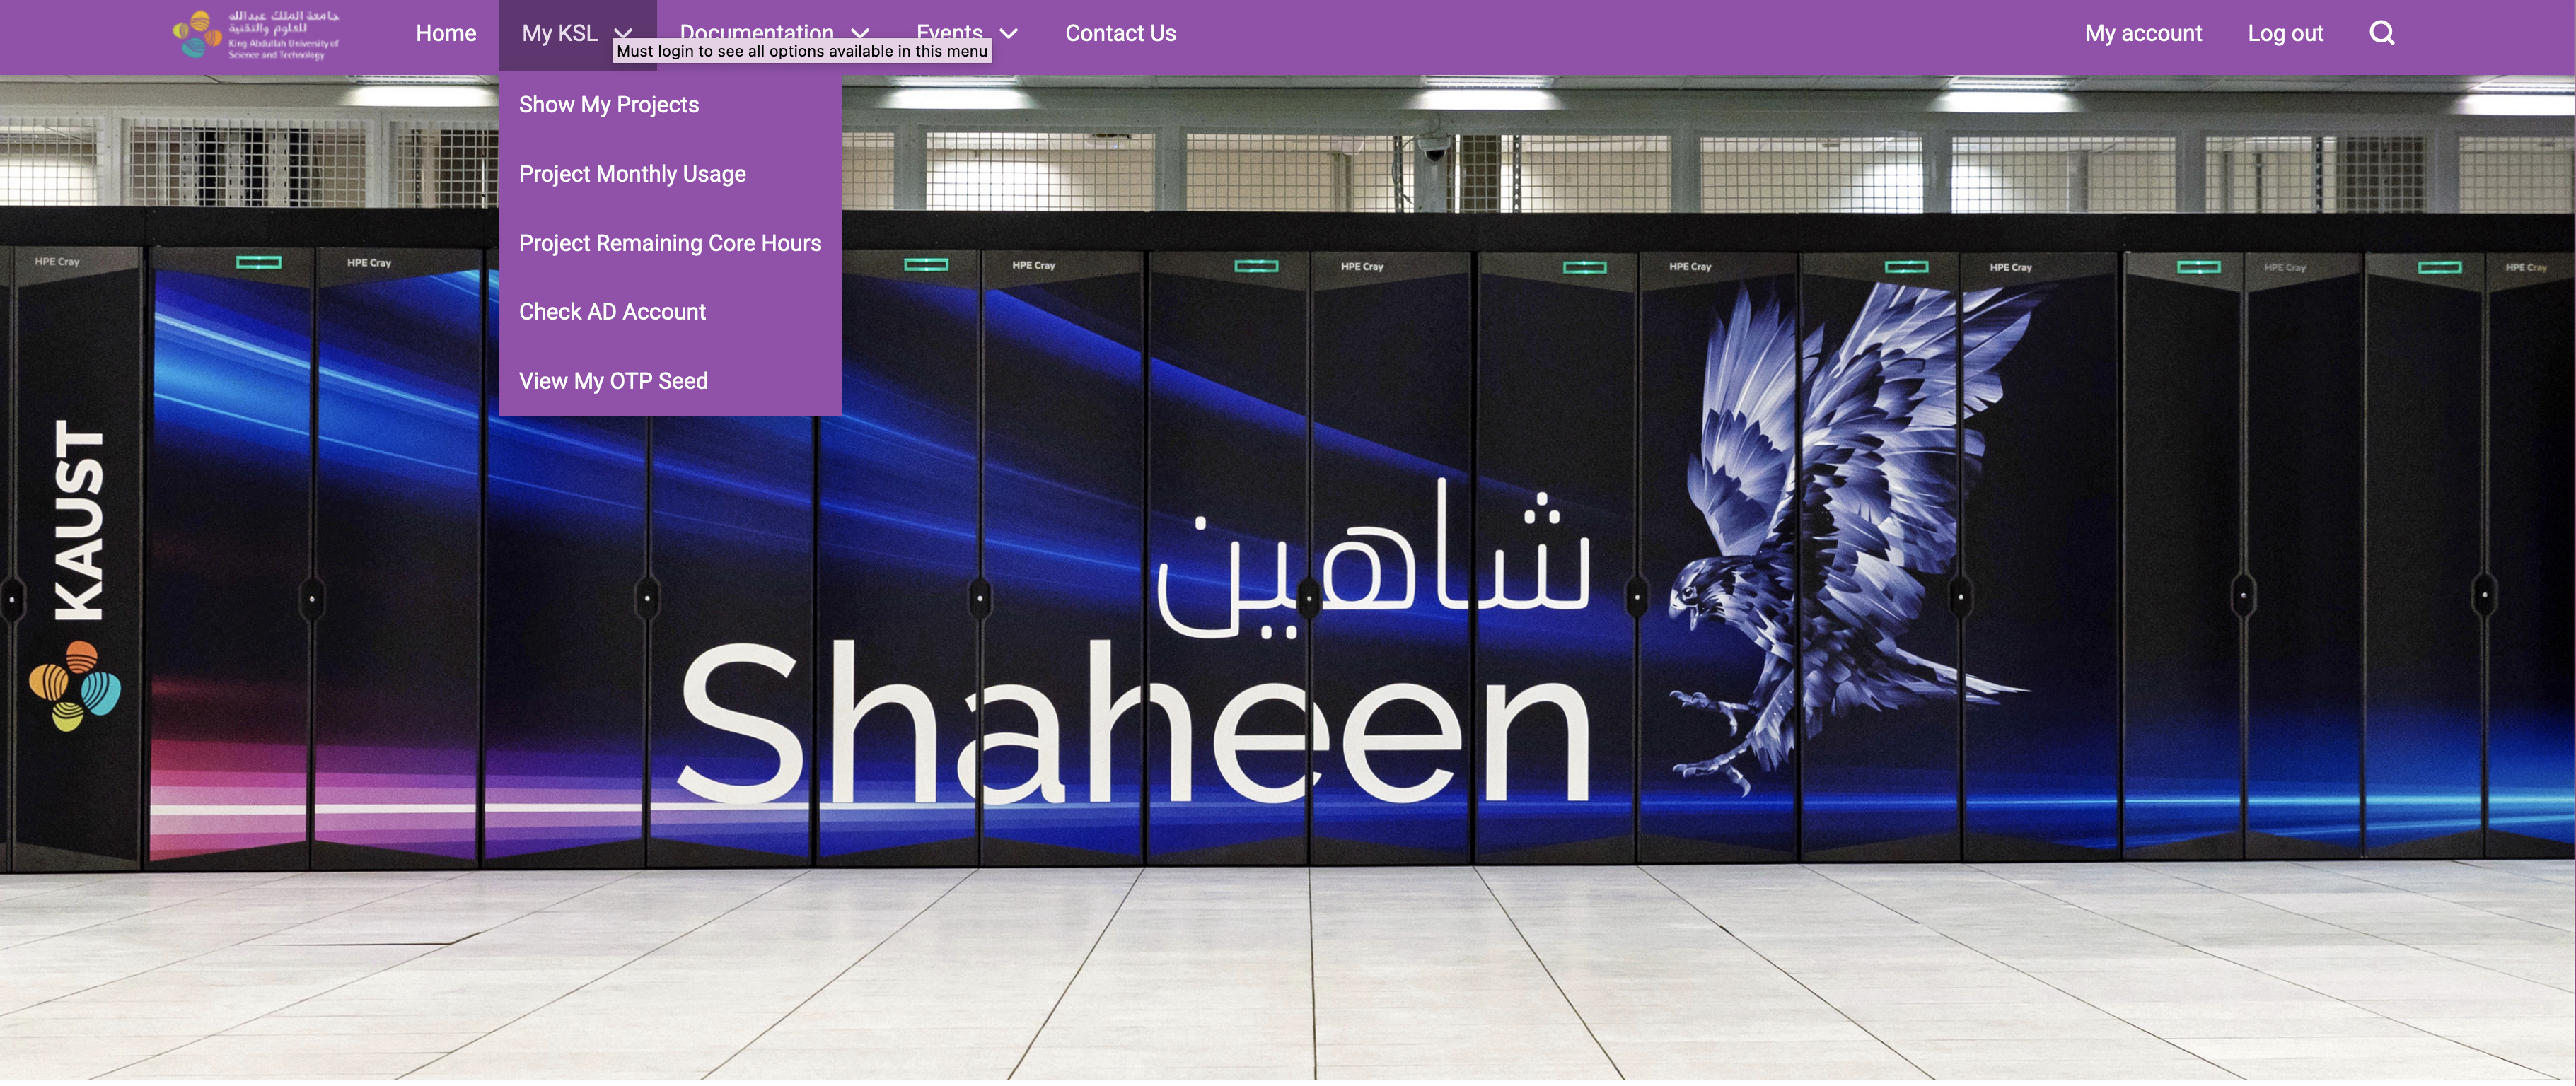
After entering your Security Question and Answer, you can proceed to the My KSL menu as shown below. The pull down will display the "View My OTP Seed" option.

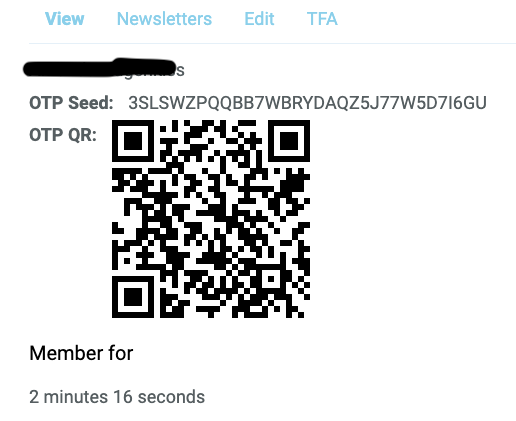
On this page, after supplying the correct answer to your Security Question, you will see both a QR code and a Base32 number, both representing your OTP seed. You can see an example screenshot below:

Adding the OTP seed with the QR code using FreeOTP:

Select the QR code scanning option (circled picture left), allow the app to use the camera if requested, then point the smartphone at the QR code. Once successfully scanned, a new FreeOTP item will be stored in the app, labeled with your AD username. When you select the item, an OTP will displayed which will be valid to use for logging into Shaheen for a duration of one minute. FreeOTP also gives you the option to enter your seed manually, using the Base32 number.
Important note - Your mobile device must be set to the correct date and time for your timezone. Otherwise, the OTP that your device generates will not match the OTP that the server is expecting when you login.
Logging in
You will be presented with a prompt to type in the OTP after you have successfully entered the SSH passphrase (or password). Only after you have successfully entered both the SSH passphrase and the OTP will you be granted access to the server:
me@myworkstation>$ ssh <username>@login.hpc.kaust.edu.sa
Use of this system is limited to users who have been properly authorised by
the KAUST Supercomputing Laboratory. Unauthorised users must disconnect
immediately.

For support, see http://www.hpc.kaust.edu.sa/
or email help@hpc.kaust.edu.sa
Enter passphrase for key '$HOME/.ssh/id_rsa': XXXXXX

Authenticated with partial success.
One-time password (OATH) for `<user-name>': XXXXXX  <-- use your OTP app to
                                                        generate password
                                                        and enter it here.
SSH keys
An alternative to using your password is to use SSH keys, which are generally considered to be more secure than using passwords. However, they are only more secure if you protect your key with a passphrase. Both password access and SSH key access are supported in Shaheen. Both methods still require the second factor to complete the authentication process. Users who make use of the SSH key method rather than passwords generally have less issues logging in.
This is a basic introduction to using ssh keys on Shaheen. It is not intended to cover every detail of using SSH keys. Also, it does not cover the use of SSH keys for those users who are using graphical tools to connect to SSH. There may be alternative solutions for this use case, which would require reading the documentation for the specific tool.
Until you have set up SSH key authentication, you will have to login using your AD password. If you have not already generated a public-private key pair on your local workstation, then you should do so now using ssh-keygen:
me@myworkstation>$ ssh-keygen -t rsa
Generating public/private rsa key pair.
Enter file in which to save the key ($HOME/.ssh/id_rsa): <--- Press <ENTER> here.
Enter passphrase (empty for no passphrase):              <--- Enter new passphrase
Enter same passphrase again:                             <--- Enter it again.
Your identification has been saved in $HOME/.ssh/id_rsa.
Your public key has been saved in $HOME/.ssh/id_rsa.pub.
The key fingerprint is:
SHA256:kAdmubrB19GATfKqsT5I4+Atw/vC3nr0iSlqcl5M1VA <user>@<workstation>
The key's randomart image is:
+---[RSA 2048]----+
|      **E        |
|     ooBo        |
|      +.+o       |
|     ..+. .      |
|   .o...S.       |
|. o+++. .        |
|++ooO+.          |
|.X=Boo           |
|**@o..           |
+----[SHA256]-----+
The public key that you have just created now needs adding to your authorized_keys file in $HOME/.ssh on Shaheen. If the ssh-copy-id command is available on your workstation, this is the easiest method. Alternatively, just copy and paste the contents of $HOME/.ssh/id_rsa.pub on your workstation into $HOME/.ssh/authorized_keys on Shaheen.
You also need to ensure that the permsissions are set correctly on the authorised keys file:
chmod 600 $HOME/.ssh/authorized_keys
